Restore Vintage Buttons and Hardware: A Step-by-Step Guide
Quick Summary
To restore vintage buttons and hardware, first identify the material by tapping, feeling and looking at each piece, then choose a method to match. Metal can take mild soap and baking-soda paste, but porous materials like shell, horn and celluloid should never be soaked.
- Tap the piece: metal rings, plastic sounds dull, and mother-of-pearl gives a soft tick.
- Never soak shell, horn, bone, celluloid, painted metal or pieces with applied decoration.
- Test any cleaning method on the least visible spot and wait 24 hours before continuing.
- Use baking-soda paste on brass and bronze tarnish, and avoid polishing plated hardware.
- Dry every piece completely before reassembly to prevent corrosion appearing weeks later.
Table of Contents
- Assessing Your Vintage Buttons and Hardware Before You Start
- A Material-by-Material Guide to Safe Cleaning Methods
- How to Clean Vintage Buttons Without Causing Damage
- How to Remove Tarnish from Vintage Hardware
- Vintage Button Cleaning Tools and Supplies You Actually Need
- How to Repair a Vintage Button Shank and Replace Missing Components
- Storing and Displaying Restored Pieces So They Last
- Frequently Asked Questions
Restore Vintage Buttons and Hardware: A Step-by-Step Guide
Last Updated: November 7, 2026
Assessing Your Vintage Buttons and Hardware Before You Start
Restoring vintage buttons and hardware is easy to do wrong if you skip the first step. Check what each piece is made of before you attempt to restore vintage buttons with water, soap or polish.
Many people grab a cleaner and start scrubbing. That is how a rare mother-of-pearl button ends up cracked or a brass pull loses its patina. A quick check takes minutes and protects the piece.
Identifying Metal, Plastic and Mother-of-Pearl Materials
Start with a close look under good light. Tap the piece gently with a fingernail and listen. Metal rings, plastic sounds dull and hollow, and mother-of-pearl often shows a soft rainbow sheen.
Use these quick checks:
- Metal: Cold to the touch, heavy, and often shows green or dark tarnish in the recesses.
- Plastic: Light weight, sometimes a faint seam line, and may look chalky or cloudy when old.
- Mother-of-pearl: Iridescent, slightly warm to the touch, and usually thinner than it looks.
Look at the back too. A stamped mark or shank style can point to the era and material.
Watch out: Never soak a button until you know its material. Water can warp older plastics and loosen the glue or thread holding a mother-of-pearl shell.
A Material-by-Material Guide to Safe Cleaning Methods
Most guides stop at "metal, plastic, and shell." In practice, vintage buttons and hardware fall into a dozen material families, and the safe method for one can ruin another. Use this decision guide to route each piece to the right treatment before you touch it.
Step 1: Run the three quick tests
Before choosing a method, confirm the material with three non-destructive checks:
- Tap test: Tap the piece against a hard surface with a fingernail. Metal rings, dense plastic thuds, horn and bone click, and mother-of-pearl gives a soft, slightly hollow tick.
- Temperature test: Hold the piece for five seconds. Metal feels cold and stays cold; plastic warms quickly; shell sits between the two.
- Hot-pin test (hidden spot only): Heat a pin and touch it to an inconspicuous area. A faint burnt-hair smell suggests horn, bone, or tortoiseshell; a chemical smell suggests celluloid or another early plastic; no reaction suggests metal or shell. Never run this test on a finished or painted surface.
Step 2: Match the material to the method
| Material family | Examples | Safest first step | Avoid |
|---|---|---|---|
| Solid brass and bronze | Cabinet pulls, escutcheons, uniform buttons | Mild soap, soft cloth, then baking-soda paste on tarnish | Long soaks, abrasive pads, ammonia dips |
| Plated base metal | Costume buttons, stamped knobs | Dry cloth only; damp cloth on stubborn grime | Polishes that cut through plating, vinegar soaks |
| Celluloid and early plastics | 1900s-1940s buttons, vanity knobs | Damp cloth, air-dry immediately | Hot water, acetone, alcohol, prolonged soaking |
| Bakelite and catalin | 1930s-1950s buttons, radio knobs | Damp cloth; a drop of mild soap | Heat above 150°F, solvents, ultrasonic cleaners |
| Mother-of-pearl and abalone | Shirt buttons, inlay | Dry or barely damp cloth | Soaking, acids, scrubbing, vinegar |
| Horn, bone, and antler | Coat buttons, toggle closures | Dry brush; barely damp cloth | Soaking, heat, harsh soap |
| Painted or enameled metal | Enamel buttons, decorated pulls | Dry cloth; damp swab on bare metal only | Solvents, abrasives, soaking |
| Fabric-covered and passementerie | Covered buttons, braid trim | Soft brush, low-suction vacuum | Water, soap, rubbing |
Step 3: Apply the soak rule
A simple rule prevents most damage: if the piece is porous, layered, or glued, do not soak it. That covers shell, horn, bone, celluloid, painted metal, and anything with an applied stone or back plate. Surface wiping with a wrung-out cloth is the ceiling for these materials. For a deeper, fabric-focused approach to safely cleaning vintage textiles attached to or near buttons, see our step-by-step guide to cleaning and restoring vintage silk. Solid brass and unplated base metal are the only families where a brief soak is generally safe.
Step 4: Test before you commit
Pick the least visible spot, the back rim, the shank, or the underside of a pull, and apply your chosen method there first. Wait 24 hours. If the surface dulls, clouds, or lifts, stop and move to a drier method.
Watch out: The hot-pin test and any solvent test should be done on a hidden area only, and never on a piece with inlay, paint, or applied decoration that you cannot replace.
How to Clean Vintage Buttons Without Causing Damage
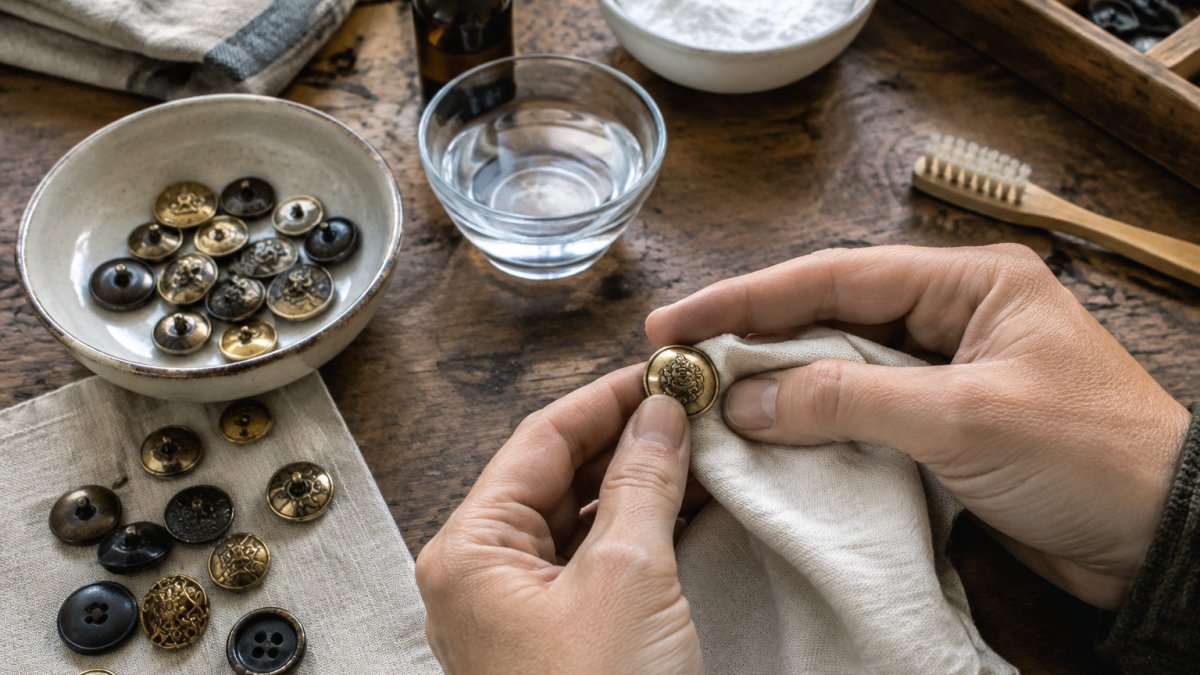
Start with dry dust removal. Use a soft brush or a dry cloth to lift loose dirt from the surface and the holes.
Next, mix a few drops of mild soap into warm water. Dip a cloth, wring it out well, and wipe each button gently.
For stubborn grime in button holes, use a dry toothbrush with light strokes.
Let buttons air-dry on a towel, away from direct heat. Make sure they are fully dry before storing them.
Watch out: Heat from a hair dryer or radiator can crack older plastics and shell.
How to Remove Tarnish from Vintage Hardware
"Hardware" in the vintage sense means more than buttons: cabinet pulls, drawer knobs, hinges, escutcheons, back plates, hooks, and latches. Each has its own tarnish pattern and its own risk of damage. Work from the gentlest method upward, and stop as soon as the piece looks the way you want it to.
Decide first: clean or preserve?
Before you polish anything, decide whether the tarnish is damage or patina. On antique brass and bronze, a dark, even film in the recesses is often original patina that collectors pay for. On plated hardware, tarnish that has turned green or black usually signals the plating is failing, and aggressive polishing will strip what is left.
Brass and bronze pulls and knobs
- Wipe first. A soft cloth and mild soap remove surface grime and reveal how much tarnish is actually there.
- Baking-soda paste for light tarnish. Mix three parts baking soda to one part water. Apply with a soft cloth or cotton swab, rub lightly in the direction of the grain, rinse with a damp cloth, and dry immediately.
- Lemon-and-salt paste for heavier tarnish. Apply briefly, no more than a minute or two, then rinse thoroughly. Acid left in crevices keeps working after you stop rubbing.
- Brass brush only on unpolished, rough castings. Skip it on smooth or engraved surfaces, where it leaves visible scratches.
- Polish and seal. A soft cloth buff removes residue. Many collectors avoid mineral oil on raw brass because it darkens over time; a thin coat of microcrystalline wax is a more stable choice for pieces you plan to handle.
Plated hardware
Plated pulls and knobs need a different approach because the tarnish sits on a thin layer over base metal. Use only a damp cloth and mild soap, dry immediately, and skip pastes and polishes entirely. If the plating is already worn through to the base metal, polishing will make the wear more obvious, not less. In that case, clean gently and consider the wear part of the piece's history.
Iron, steel, and painted hardware
- Iron and steel: Remove loose rust with a dry brush or fine bronze wool, then wipe with a lightly oiled cloth to slow new rust. Avoid water soaks, which drive rust into joints and screw holes.
- Painted or enameled hardware: Clean with a damp cloth only. Solvents and abrasives lift paint and enamel, and there is no way to spot-repair a lifted edge invisibly.
Hinges, latches, and moving parts
Tarnish on moving hardware is secondary to function. Brush out grit, apply a dry lubricant such as graphite or a silicone spray to the pivot, and work the mechanism a few times. Avoid oil on visible brass surfaces, where it attracts dust and darkens over time.
Drying and reassembly
Dry every piece completely before reassembly. Water trapped behind a pull or inside a hinge screw hole causes corrosion that shows up weeks later. Set pieces on a towel in a warm, dry room, and give screws and back plates the same drying time as the visible hardware.
Watch out: Do not use a brass brush, paste, or acid dip on plated, painted, or enameled hardware, each of these removes the finish along with the tarnish, and the damage cannot be reversed.
Vintage Button Cleaning Tools and Supplies You Actually Need
You do not need a large kit. A few inexpensive items handle most jobs:
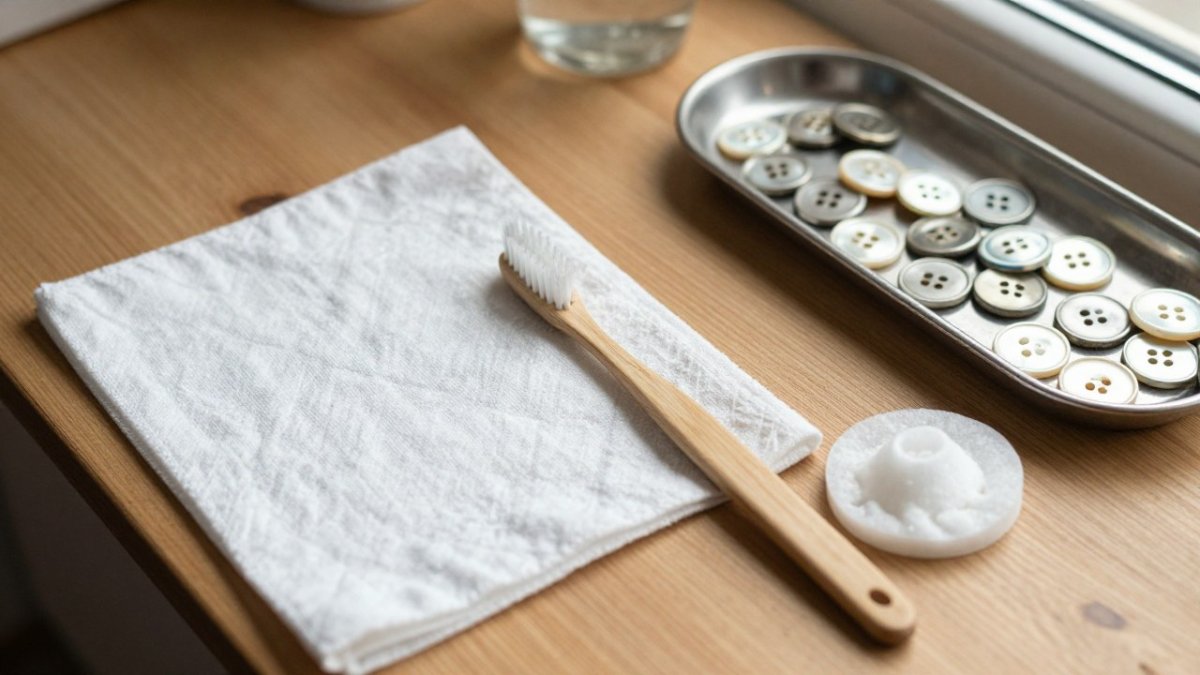
- A soft, clean cloth (lint-free works best)
- A dry toothbrush for crevices
- A small brass brush for tarnished hardware
- Mild dish soap
- Baking soda
- A shallow tray lined with a soft cloth for drying
!Overhead view of a soft cloth, dry toothbrush, mild soap dish and a tray of vintage metal and mother-of-pearl buttons on a wooden table in natural light
Keep these tools separate from anything you use on modern hardware so you do not transfer grit or polish.
How to Repair a Vintage Button Shank and Replace Missing Components
Check the shank first. This is the loop on the back of the button that attaches it to fabric.
For a loose shank, a small drop of clear adhesive suited to the material can help. Use very little and let it cure fully.
If a piece is missing a component entirely, such as a back plate or a decorative stone, look for a matching part from a button collector or estate source.
Keep a note of any repairs you make so future owners know what was done.
Storing and Displaying Restored Pieces So They Last
Store buttons in a closed box lined with soft fabric. Keep them in a dry spot with steady temperature and low humidity. Humidity causes tarnish and can warp plastics.
Keep each material separate. Metal and mother-of-pearl should not rub against each other. A divided tray works well.
For display, use a shadow box or a glass-front frame. Limit direct sunlight, which can fade plastics and dull shell over time.
Explore our restored vintage leather accessories guide for more on caring for pieces after restoration.
Restoring a collection takes patience, but the right first step makes all the difference.
Frequently Asked Questions
Are any vintage buttons valuable?
Some vintage buttons are worth collecting, particularly those made from mother-of-pearl, early celluloid, Bakelite, or hand-carved materials, and buttons with unusual makers' marks, intact original shanks or strong designs. Most everyday metal and plastic buttons from mass production have modest resale value. Before cleaning, examine each piece for markings and material, because aggressive cleaning can reduce both appearance and value. If you are unsure, a local antiques dealer or a button collectors' group can give you an informed opinion.
Can you clean vintage buttons with soap and water?
Yes, for many vintage buttons a few drops of mild dish soap in lukewarm water and a soft cloth are the safest starting point. Dry the piece thoroughly with a clean cloth and let it air-dry. Avoid soaking buttons with fabric backings, painted surfaces, or loose shanks, since water can loosen glue and stain fibers. Mother-of-pearl and celluloid should not be submerged for long, and you should always test a hidden spot first.
How do you restore mother-of-pearl buttons?
Mother-of-pearl buttons respond best to gentle cleaning with mild soap and water, followed by a soft cloth and thorough drying. Avoid harsh chemicals, abrasives, and prolonged soaking, which can cause cracking, clouding, or peeling of the iridescent layer. If the surface has dull grime, a very light buffing with a soft cloth often restores enough shine. Store them away from heat and direct sunlight to prevent future damage.
When should you avoid cleaning or polishing vintage buttons and hardware?
Avoid cleaning when a piece has original patina that adds historical value, when a finish is flaking or painted, or when the material is unidentified and could be damaged by water or abrasives. Do not use metal polish on plated hardware, since it can strip the plating. Skip cleaning on fragile celluloid or delicate carved pieces. When in doubt, stabilize the item with dry dusting and seek professional advice before doing anything more invasive.

Read more
Best Men's Leather Wallets for Everyday Carry: Tested Picks
Compare the best men's leather wallets for everyday carry, with slim and bifold picks, loaded thickness, card capacity and care tips to help you choose.
Read more
Vintage Tie Patterns That Work in Professional Settings
Vintage tie patterns can work in a professional office if you match scale and contrast to the setting.
Read more