
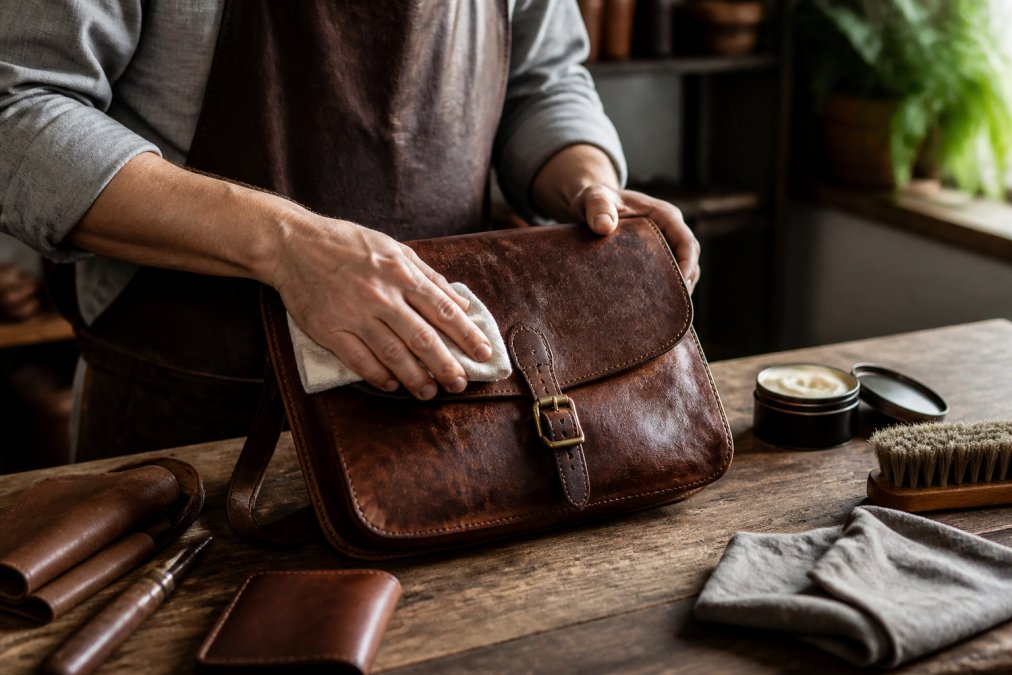
How to Maintain Vintage Leather Accessories
Table of Contents
- Why Vintage Leather Needs Different Care
- Restoration vs. Maintenance: Know the Difference
- Daily Cleaning and Dusting Routines
- How to Condition Vintage Leather: The Right Way
- Choosing the Best Leather Conditioner for Vintage Bags
- How Often to Condition Vintage Leather
- How to Store Vintage Leather Accessories
- Removing Stains and Handling Spills
- Frequently Asked Questions
Last Updated: September 9, 2026
Why Vintage Leather Needs Different Care
Vintage leather is not the same material as new leather, and treating it like a modern hide is the fastest way to ruin a treasured piece. Aged leather has already lost a significant portion of its natural oils, making it drier, more porous, and far more susceptible to cracking (peer-reviewed research). The tanning processes used decades ago also differed from modern methods, meaning the leather's reaction to conditioners, cleaners, and even water can be unpredictable.

Aged cowhide, lambskin, and other vintage materials can suffer irreversible damage, including dye stripping, surface dulling, and accelerated dehydration, when aggressive cleaning products are applied.
The core difference comes down to structural integrity. New leather has a strong fiber network saturated with oils. Vintage leather has stiffened fibers and open pores that absorb products unevenly. What works on a new jacket can stain or darken a vintage piece permanently. This guide walks you through the specific routines that protect aged hides, from daily dusting to deep conditioning, so your investment lasts another generation.
Restoration vs. Maintenance: Know the Difference
Most owners confuse restoration with maintenance, and that confusion leads to over-treating their accessories. Maintenance is the preventive, regular care that keeps healthy leather supple and protected. Restoration is the corrective work needed when leather has already cracked, faded, or lost its finish, and it often requires professional intervention.
A common mistake is attempting restoration during routine maintenance. If your vintage bag has deep cracks, peeling finish, or stiff, brittle sections, do not reach for a heavy conditioner expecting it to repair structural damage. Conditioners moisturize; they do not rebuild torn fibers or replace lost finish.
Maintenance tasks you can handle at home include dusting, gentle cleaning with pH-balanced soap, conditioning, and proper storage. Restoration tasks, such as recoloring, finish reapplication, or crack repair, belong with a professional leather conservator. Attempting DIY restoration on a valuable piece frequently lowers its worth and can destroy the very patina that gives vintage leather its character.

Knowing which category your accessory falls into prevents wasted effort and costly mistakes. When in doubt, err on the side of minimal maintenance and consult a specialist before attempting any corrective treatment.
Daily Cleaning and Dusting Routines
The single most effective thing you can do for vintage leather is dust it regularly, because abrasive particles are the primary cause of surface scratches and finish wear. A quick weekly routine removes the grit that gradually dulls the grain and opens the door to deeper damage.

Start with a soft, dry microfiber cloth or a natural fiber brush with gentle bristles. Synthetic bristles can be too stiff for aged leather and may leave micro-scratches. Work in light, sweeping motions, following the natural direction of the grain. Pay special attention to creases, seams, and areas around hardware where dust accumulates.
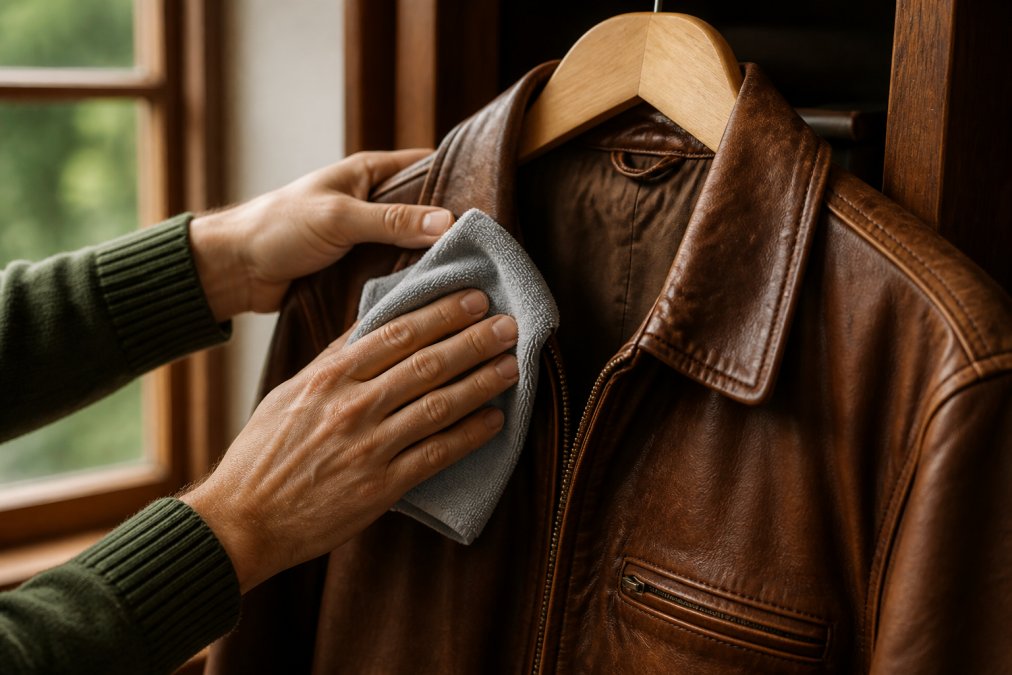
For surface dirt that dusting misses, dampen a cloth with distilled water, wring it thoroughly, and wipe the leather. Distilled water matters because tap water contains minerals and chlorine that can leave residues on porous vintage hides (the CDC). Never soak the leather, and always let it air dry away from direct heat or sunlight.
A critical rule: test any cleaning method on a hidden area, such as an interior seam or under a flap, before touching visible surfaces. This spot test reveals how the leather reacts to moisture and prevents unpleasant surprises on the main panels.
How to Condition Vintage Leather: The Right Way
Conditioning is the heart of how to maintain vintage leather accessories, but it requires a lighter touch than most owners expect. The goal is to replace lost oils and restore suppleness without saturating the leather, because over-conditioning leaves a greasy residue that attracts dirt and can soften the hide too much.
Begin by ensuring the leather is clean and completely dry. Apply a small amount of conditioner to a soft cloth, then work it into the leather using circular motions. Less is more here: you can always add another thin layer, but removing excess conditioner from a saturated hide is difficult.
Let the conditioner absorb for several hours or overnight, then buff the surface with a clean, dry cloth to remove any residue and restore a natural sheen. This buffing step is essential, as it distributes the conditioner evenly across the leather pores and prevents blotchy dark spots.
The leather should feel supple but not damp or oily after conditioning. If it feels sticky, you have applied too much. If it still feels stiff after two conditioning sessions, the leather may be beyond simple maintenance and needs professional assessment.
Choosing the Best Leather Conditioner for Vintage Bags
The best leather conditioner for a vintage bag is one that replenishes oils without altering the finish or leaving a synthetic barrier. The market is crowded with products formulated for modern, factory-finished leather, and many are too aggressive for a 40-year-old hide. The key is to understand what you are buying and to source products that are explicitly safe for delicate, aged materials.
First, read the ingredient list, not the marketing label. You want conditioners built on a base of natural oils and waxes common in mid-century leather care: neatsfoot oil, mink oil, lanolin, and beeswax. These penetrate the fiber structure and mimic the fats lost over decades. Products like Fiebing's Aussie Leather Conditioner (a blend of neatsfoot oil and lanolin) or Leather Honey (a lanolin-based formula) are frequently cited by vintage collectors as safe starting points. Avoid anything with a high silicone content, often listed as dimethicone or cyclomethicone, because it sits on the surface, creating a plasticky sheen that attracts dust and prevents the leather from breathing.
Second, beware of 'one-step' cleaners or 'cleaner-conditioners.' These products rely on solvents to dissolve surface dirt, and those same solvents strip the little oil that remains in a vintage hide. A dedicated conditioner, applied to already-clean leather, is almost always the safer route.
Third, check the pH. Most vintage leather was tanned and finished in a slightly acidic state. A conditioner with a high pH (alkaline) can cause the leather to darken unevenly or become brittle. Look for products that state they are pH-balanced for leather, or test with a pH strip if you are unsure. A safe range is between 4.5 and 6.5 (nps.gov).
Finally, source from specialty suppliers, not big-box stores. Companies like The Leather Care Shoppe or suppliers that cater to saddle makers and bookbinders often stock formulations closer to what was used when your bag was made. When in doubt, contact the seller directly and ask: 'Is this safe for a finished vintage leather that has lost its original oils?' If they cannot answer, move on.
The right conditioner should leave the leather feeling supple and looking slightly richer in color, without dramatically darkening it. If a product darkens the leather significantly, it is likely too heavy for your piece. Test on a hidden seam first, and always err toward lighter, more natural formulations. preserving vintage clothing.
How Often to Condition Vintage Leather
Conditioning frequency depends on the leather's condition, the climate you live in, and how often you use the accessory. A reasonable starting point for most vintage pieces is conditioning every six to twelve months, but this schedule should adjust based on visible signs of dryness.
Leather that feels stiff, looks dull, or shows tiny surface cracks is telling you it needs moisture sooner. Conversely, leather that still feels supple and shows a healthy sheen may not need conditioning for a year or more. Over-conditioning is a real risk with vintage pieces, so let the leather's condition guide your schedule rather than a rigid calendar.
Climate plays a significant role. Dry, arid environments and heated indoor air during winter accelerate moisture loss, meaning leather may need conditioning more frequently. Humid climates slow evaporation, so you can often extend the interval between treatments.
A simple test: press your fingertip into the leather. If the surface springs back quickly and feels smooth, moisture balance is adequate. If it feels stiff, leaves a slight impression, or shows fine cracks, it is time to condition. This tactile check, performed monthly, is more reliable than any fixed schedule.
How to Store Vintage Leather Accessories
Proper storage is just as important as conditioning, because environmental factors cause most long-term leather damage. The ideal storage environment is cool, dark, and moderately humid, with temperatures between 60 and 75 degrees Fahrenheit and humidity around 40 to 50 percent.
Never store vintage leather in plastic bags or airtight containers. Leather needs to breathe, and trapped moisture leads to mold and mildew growth. Instead, wrap each piece in a breathable fabric dust bag, such as cotton or muslin, which protects against dust while allowing air circulation.
Stuff bags and structured accessories with acid-free tissue paper to help them hold their shape. Avoid newspaper, which can transfer ink, and never hang heavy leather bags by their straps, as this stretches the leather over time. Jackets should hang on wide, padded hangers that distribute weight evenly across the shoulders.
Climate-specific care matters here. If you live in a humid region, consider adding silica gel packets to your storage area, but check them regularly and replace them before they saturate. In dry climates, a small humidifier in the closet can prevent the leather from becoming brittle.
Removing Stains and Handling Spills
Stain removal on vintage leather is a different game than on modern hides. Aged leather is more porous, meaning liquids penetrate deeper and faster, and the original finish, whether it was a pigment, an aniline dye, or a topcoat, has likely worn thin in spots. Acting quickly is critical, but so is knowing what you are dealing with before you apply anything.
Immediate Response for Liquid Spills
Blot, never rub. Rubbing pushes the liquid into the fiber structure and can spread the stain. Use a clean, dry, white cotton cloth or a paper towel. Press firmly and lift. For water-based spills (coffee, tea, juice), after blotting, dampen a cloth with distilled water and gently dab the area to dilute any residue. Distilled water is essential; tap water contains minerals that can leave a chalky deposit on porous leather.
Oil and Grease Stains
Oil is the most common and most stubborn stain on vintage leather. The challenge is that the oil has likely been absorbed deep into the fibers. A common technique is to cover the stain generously with cornstarch or unscented talcum powder and let it sit for 24 to 48 hours. The powder draws the oil to the surface. Brush it away with a soft brush and repeat if necessary. Do not use heat (like a hair dryer) to speed this up; heat will set the oil deeper.
Ink Stains
Ink is the most dangerous stain to treat at home. The solvents that dissolve ink, alcohol, acetone, hairspray, will also dissolve the leather's finish and can cause the ink to bleed into a larger area. For ballpoint pen marks on a finished surface, a very light touch with a cotton swab dipped in isopropyl alcohol (70%) might lift the ink, but you must test on a hidden seam first and work in tiny, circular motions. For fountain pen ink or any stain that has set for more than a few hours, skip the home remedies. Professional conservators have access to specialized solvents and techniques that can lift ink without damaging the hide.
Hardware and Metal Components
Vintage accessories often have metal hardware, brass buckles, nickel zippers, gold-tone clasps, that requires separate care. Do not get leather conditioner on the hardware, as it can seep into the metal fittings and attract dirt. For tarnished brass, use a dedicated metal polish like Brasso, but apply it with a cotton swab and mask off the surrounding leather with painter's tape. Never use abrasive metal cleaners on plated hardware (like gold-tone or silver-tone), as they will strip the plating. Instead, gently buff with a soft, dry cloth. For rust on steel components, a very fine steel wool (grade 0000) can be used, but only on the metal and with extreme care.
After any stain treatment, condition the area lightly to replace oils lost during cleaning. Some stains, particularly from dyes or inks, may be permanent on porous vintage leather. Attempting aggressive removal often causes more damage than the stain itself. In those cases, the most professional choice is to accept the stain as part of the piece's history or consult a restorer about recoloring options.
Frequently Asked Questions
How should I care for vintage leather?
Care for vintage leather by dusting it weekly with a soft, dry microfiber cloth to prevent dirt from settling into the grain. Clean it sparingly using a mild soap like castile soap diluted in distilled water, and always test any product on a hidden area first. Condition the leather every 6 to 12 months with a product designed for delicate, aged hides to maintain moisture balance. Store pieces in a breathable cotton dust bag away from direct sunlight and heat sources.
What is the best conditioner for old leather bags?
The best leather conditioner for vintage bags is a pH-balanced, wax-based protectant or a conditioner specifically formulated for delicate, aged leather. Avoid heavy oils that can oversaturate the hide and darken its color. Look for products containing lanolin or neatsfoot oil in small amounts. Apply a thin, even layer with a soft cloth, let it absorb for 15 minutes, then buff gently to restore suppleness without leaving a sticky residue on the surface.
How often should I condition vintage leather?
Condition vintage leather every 6 to 12 months, depending on your climate and how often you use the item. In dry environments, leather loses moisture faster, so condition closer to every 6 months. If the leather feels stiff, looks dull, or shows faint cracking at flex points, it needs conditioning sooner. Be careful not to over-condition, as this can clog leather pores and attract dust. Always test a new conditioner on a hidden spot first.
Does Vaseline preserve leather?
Vaseline is not recommended for preserving vintage leather. Petroleum jelly can clog the leather's pores, preventing it from breathing and trapping dirt beneath a greasy film. Over time, this leads to a sticky surface that attracts more debris and can cause the leather to break down. Use a dedicated leather conditioner with a balanced formula instead. These products are pH-balanced and designed to maintain moisture balance without harming the hide.
Read more
Fast Shipping Premium Clothing Stores: 2026 Guide
Compare fast shipping premium clothing stores with real delivery speeds, costs, and policies. Find out which retailers get premium apparel to your door.
Read more
How to Identify Authentic Vintage Style: 2026 Guide
Learn how to identify authentic vintage style using tags, stitching, and hardware. Spot fakes and build a timeless wardrobe. Explore the guide now.
Read more