Article: 7 Steps to Break In New Leather Boots Fast
7 Steps to Break In New Leather Boots Fast
Last Updated: October 26, 2026
Quick Summary
Break in new leather boots fast by wearing them indoors for 30 to 60 minutes a day, flexing the leather by hand and on stairs, and conditioning sparingly. Add 20 to 30 minute outdoor walks once indoor sessions feel comfortable. Most leather boots need one to three weeks of regular wear.
- Check fit first: about a thumb's width of toe room and no more than a quarter inch of heel slip.
- Wear cushioned, breathable socks every session to reduce friction and prevent blisters.
- Knead stiff spots like the heel counter with your thumbs for 2 to 3 minutes daily.
- Never soak boots in water or use ovens, radiators, or hair dryers to speed break-in.
- See a cobbler if a specific spot still pinches after three to four weeks of steady wear.
Table of Contents
- Why New Leather Boots Feel Stiff (and What Break-In Really Means)
- Check the Fit First: Break-In Stiffness vs. the Wrong Size
-
The Fast, Safe Break-In Plan: 7 Steps in Order
- Step 1: Confirm the Fit Before Anything Else
- Step 2: Start With Short Indoor Wear Sessions
- Step 3: Pair Them With the Right Socks
- Step 4: Flex the Leather by Hand and on Stairs
- Step 5: Work the Stiff Areas With Gentle Hand Pressure
- Step 6: Condition the Leather Sparingly
- Step 7: Add Time on Familiar Short Walks
- How Long Does It Take to Break In Leather Boots?
- How to Prevent Blisters From New Boots During Break-In
- How to Soften Leather Boots Without Damaging Them
- How to Stretch Leather Boots at Pressure Points
- Methods to Avoid, and When to See a Cobbler or Return the Boots
- Frequently Asked Questions
Why New Leather Boots Feel Stiff (and What Break-In Really Means)
New leather boots feel stiff because the hide is still tight and dry, and it has not yet shaped itself to your foot.
That stiffness is not a flaw. The American Podiatric Medical Association notes that proper fit matters most for foot comfort, and break-in should never involve real pain (APMA footwear guidance).
Break-in is a controlled process: push too hard and you get blisters and creases in the wrong places; go too slow and you waste weeks.
Check the Fit First: Break-In Stiffness vs. the Wrong Size
Break-in stiffness is tight, even pressure that eases with wear. The wrong size is sharp, pinpoint pressure that never improves.
Run this check before your first wear session:
- Toe room: You should have about a thumb's width between your longest toe and the front of the boot.
- Heel slip: A little lift at the heel is normal in new boots. More than a quarter inch means the boot is too long.
- Widest point: The boot should feel snug across the ball of your foot, not pinched.
If the boots fail the size check, stop. No amount of conditioning fixes a boot that is a half size too small. Our men's classic leather lace-up boots come in a full size run from 39 to 45, so you can dial in the fit first.

The Fast, Safe Break-In Plan: 7 Steps in Order
The fastest safe way to break in leather boots is to soften the leather gradually while protecting your feet. Follow these seven steps in order; skipping ahead is how people get blisters.
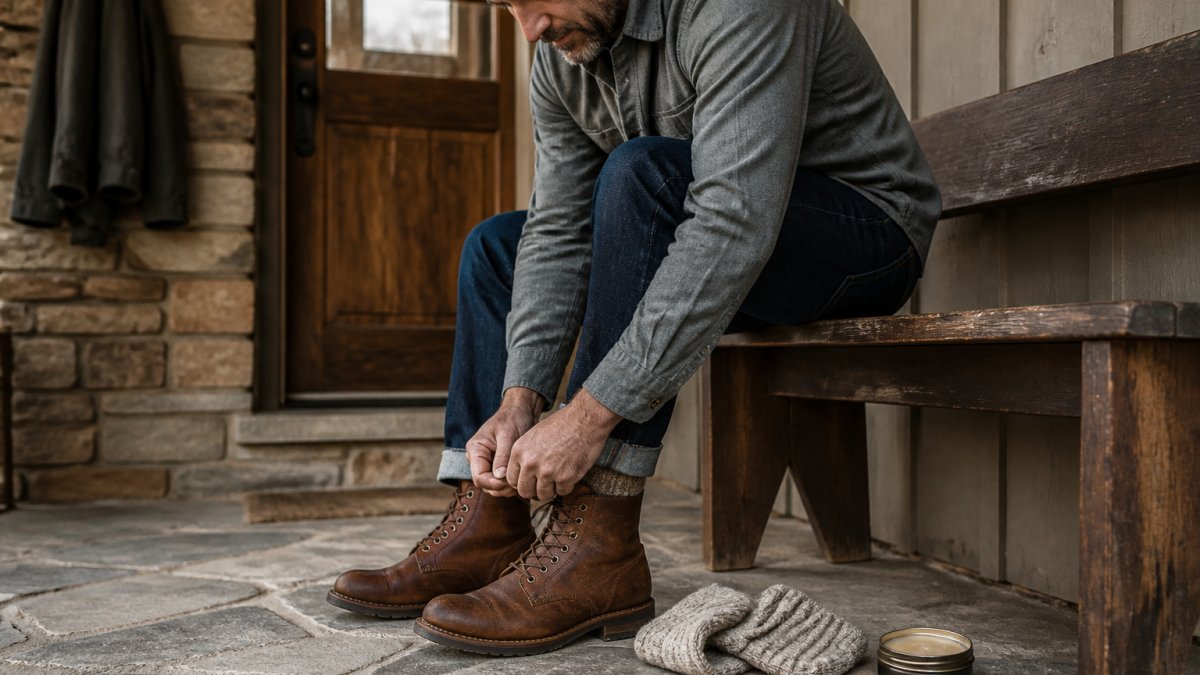
Step 1: Confirm the Fit Before Anything Else
Recheck the four fit points above. If anything pinches sharply, return or exchange the boots before wearing them outside. If you are comparing styles, consider these Savone Mens Chelsea Boots.
Step 2: Start With Short Indoor Wear Sessions
Wear the boots indoors for 30 to 60 minutes a day for the first few days, clean floors, no weather, no long distances. This lets the leather warm to your body heat and flex without stressing your skin. Gradual exposure prevents the friction that leads to blisters, a necessary precaution since healing cracked skin requires far more patience than simply waiting for a pair of boots to soften.
Step 3: Pair Them With the Right Socks
Socks are your blister insurance. Choose a cushioned, breathable pair that covers the heel and ankle; thick socks also fill small gaps in a new boot, reducing friction.
Step 4: Flex the Leather by Hand and on Stairs
Work the boot upper with your hands: bend the toe box, roll the shaft, and flex the sole at the ball of the foot. Then walk up and down stairs slowly; stairs force the boot to bend exactly where your foot does.
Step 5: Work the Stiff Areas With Gentle Hand Pressure
Find the stiff spots, usually the heel counter and the sides of the toe box, and knead them with your thumbs for a minute or two at a time. Gentle, repeated pressure softens the fibers without cracking the finish.
Step 6: Condition the Leather Sparingly
Apply a small amount of leather conditioner with a soft cloth, working it into the stiff areas. Wipe off the excess and let the boots dry fully away from direct heat. Conditioner restores oils and keeps the hide supple, but too much over-softens the leather and dulls its shape, less is more.
Step 7: Add Time on Familiar Short Walks
Once indoor sessions feel comfortable, take the boots outside for 20 to 30 minute walks on routes you know, with a backup pair of shoes in case a hotspot flares. Add time gradually.
| Step | Time Per Session | Frequency | What It Fixes |
|---|---|---|---|
| 1. Confirm fit | 10 minutes | Once | Rules out wrong size |
| 2. Indoor wear | 30-60 minutes | Daily, first week | Warms and starts flexing leather |
| 3. Right socks | Every session | Always | Friction and blisters |
| 4. Flex by hand and stairs | 10 minutes | 3-4 times weekly | Stiff sole and upper |
| 5. Hand pressure | 2-3 minutes per spot | Daily | Heel counter and toe box stiffness |
| 6. Condition | Once | Repeat monthly | Dryness and cracking |
| 7. Short walks | 20-30 minutes | Daily, week two on | Real-world flex and fit |
How Long Does It Take to Break In Leather Boots?
Most leather boots need one to three weeks of regular wear to break in. Thin, supple leather can feel comfortable within a week. Thick, full-grain leather with a structured sole often takes three to four weeks.
Several things move that timeline:
- Leather thickness: Thicker hides take longer to soften.
- Construction: A stitched leather sole flexes more slowly than a rubber one.
- How often you wear them: Daily short sessions beat one marathon day.
Track progress with a simple check. Press your thumb into the stiffest spot each week. When it gives easily and the boot bends without fighting you, break-in is done.
How to Prevent Blisters From New Boots During Break-In
Blisters come from friction and moisture, not from leather being "mean." Cut both and you cut blisters. A common mistake is wearing brand-new boots for a full workday on day one. That is how hotspots turn into sores.
Use this routine:
- Break in new boots in short blocks. Thirty to sixty minutes beats eight hours.
- Wear moisture-wicking socks. Cotton holds sweat against the skin.
- Tape known hotspots before you walk. A simple blister bandage on the heel or toe prevents most problems.
If a blister does form, treat it early. The American Academy of Dermatology's guidance on blister care recommends keeping the area clean and protected while it heals.
How to Soften Leather Boots Without Damaging Them
The safe way to soften leather boots is slow and mild: warmth from your own feet, controlled flexing, and a light application of conditioner. Heat and water are where people go wrong, and the damage is usually permanent. What softens leather in the tannery also softens it at home: a little moisture and oil plus mechanical flexing. Leather is a network of collagen fibers coated in oils and waxes; when those oils migrate out, the fibers lock together and the hide feels board-stiff.
Match the method to the leather
Not all leather responds the same way, and the wrong method on the wrong hide ruins boots:
- Full-grain and oiled leather: The most forgiving. Body heat, flexing, and a light conditioner work well. These hides absorb oil readily, so condition sparingly and expect a slight color shift.
- Suede and nubuck: Do not use standard cream conditioner, which mats the nap. Use a suede-specific protector and rely mostly on flexing and wear; water-based stretching sprays can leave tide marks.
- Patent and polished finishes: The finish is a coating, not the hide itself. Conditioner cannot reach the leather through it, and heat will crack the coating. Rely on flexing and time; avoid sprays that can cloud the shine.
The safe softening toolkit
- Wear them. Body heat and movement soften leather better than any shortcut, and they do it evenly.
- Condition lightly. A thin layer of leather conditioner restores oils and keeps the hide supple. Apply with a soft cloth, work it into stiff areas, and wipe off the excess.
- Flex by hand. Repeated bending loosens the fibers at the flex points without stressing the seams.
Ranked by risk: what to avoid and why
- Soaking boots in water (highest risk). Water swells the fibers, then shrinks them as it dries, leaving stiff, wrinkled patches and weakened stitching, and it leaches out the oils that keep leather supple. There is no safe way to fully soak a leather boot.
- Oven, radiator, fire, or hair dryer (high risk). High heat drives out the leather's natural oils and cracks the finish. Once the finish cracks, it cannot be repaired, only refinished by a professional.
- Whole-boot stretching (moderate risk). A generic stretcher pushes the entire boot out of shape. Stretch only the specific pressure point.
A useful rule: if a method involves more heat than a warm room or more water than a damp cloth, it is too aggressive for leather you want to keep.
How to Stretch Leather Boots at Pressure Points
Stretch leather boots only at the specific spot that pinches, never across the whole boot. Whole-boot stretching ruins the shape and can pull the boot off its last permanently.
Before you stretch, confirm the pinch is a break-in issue, not a sizing issue. A pressure point that improves slightly with wear is a candidate for stretching. A sharp, pinpoint pain that never changes, or a toe box that is simply too short, is a sizing problem.
What stretching can and cannot fix
- Can help: a tight instep, a pinching side seam, a snug heel counter, or a toe box that is slightly narrow across the ball.
- Cannot fix: a boot that is too short in length, a heel that slips because the boot is too long, or a last that is fundamentally the wrong shape for your foot.
Targeted stretching, step by step
- Identify and mark the exact pressure point. Wear the boot with your normal socks, walk ten steps, and mark the hotspot with tape on the outside of the leather.
- Apply a leather-stretching spray to that area only, following the product directions. These sprays are typically water-and-alcohol blends that temporarily relax the fibers. Do not saturate the boot, and do not use them on suede, nubuck, or patent finishes, where they can leave marks or cloud the shine.
- Wear the boots with thick socks while the leather is still slightly damp. The sock acts as a last, pushing the leather out from the inside exactly where your foot presses.
- Walk and flex for 20 to 30 minutes. Keep it short; the goal is a gentle push, not a marathon.
- Let the boots dry fully before the next session, away from heat. Repeat over several days rather than forcing it in one session.
When to use a professional stretcher
For stubborn spots, or structured and expensive boots, a shoe repair shop can stretch the boot on a professional stretcher. A cobbler can spot-stretch a specific area with more control than a home spray, and can tell you whether the leather has enough give to stretch at all. This is the safer route for welted boots, lined boots, and any pair where a mistake would be costly.
If a specific spot still pinches after three to four weeks of steady wear and one or two careful stretching sessions, stop stretching and reassess the fit. Persistent pressure at the same point is a sign the boot is the wrong size or last for your foot, not a sign you need to stretch harder.
Methods to Avoid, and When to See a Cobbler or Return the Boots
See a cobbler if a specific spot still pinches after three to four weeks of steady wear, or if a seam or sole needs adjustment. Return or exchange the boots if the fit was wrong from the start, if the toe box is too short, or if the heel slips more than a quarter inch. Know the difference: break-in stiffness fades, wrong-size pressure does not. Trust that signal and you save both your feet and your money.
Breaking in leather boots takes patience, but not months. Start with the right fit, wear them in short blocks, protect your feet, and let the leather soften at its own pace. More than 20,000 happy customers have made us their first stop for leather staples. Get started with Vinthentic and step into boots that feel like yours from the first week.
Frequently Asked Questions
How can I break in new leather boots quickly without damaging them?
Work in short, repeated sessions rather than one long day. Wear the boots indoors for 30 to 60 minutes, flex the leather by hand at the toe box and heel counter, then take a 10-minute walk. Repeat daily and add 15 to 20 minutes each time. Keep heat away from the leather and condition only when the surface feels dry. Rushing with water, a hair dryer, or a long first wear is what causes cracking, stretched seams, and blisters.
How long does it usually take to break in leather boots?
Most leather boots need roughly one to three weeks of regular, gradual wear before they feel supple. Thin, flexible leather can soften in about a week of daily short sessions, while thick or heavily structured boots often need three to four weeks. Track progress by how the pressure points feel at the end of each session, not by the calendar. If a spot still hurts sharply after two weeks, the issue is usually fit rather than stiffness.
Should I wear thick socks when breaking in leather boots?
Yes, for the first week or two. Thick wool or merino socks add a cushioning layer between your skin and the boot upper, which reduces friction at the heel and instep. They also fill small gaps so the leather molds to a slightly fuller shape. Once the boots soften, switch to the socks you plan to wear day to day and check that the fit still feels secure rather than loose.
Can I use a hair dryer or water to soften leather boots faster?
Skip both. Direct heat dries out the leather oils that keep it supple, which leads to cracking and a stiff, brittle surface over time. Soaking the boots can weaken the construction and leave water stains. A leather-stretching spray applied only to a tight spot is a safer option, and a leather conditioner used sparingly does more for softness than heat ever will. For stubborn pressure points, a cobbler can stretch the boots precisely.

Read more
Which Fabrics Work Best for a Sustainable Capsule Wardrobe?
Build a sustainable capsule wardrobe with eco-friendly fabrics that last. Learn which materials work best and how to care for them properly.
Read more