
5 Vintage Craftsmanship Standards for Beginners
Table of Contents
- How to Spot High-Quality Vintage Clothing Before You Buy
- Standard 1: Vintage Classification and Provenance
- Standard 2: Identifying Authentic Vintage Fabrics and Material Composition
- Standard 3: Vintage Clothing Construction Techniques That Signal Quality
- Standard 4: Hardware Durability and Functional Assessment
- Standard 5: Condition Grading, Wear and Tear, and Restoration Potential
- Preservation and Care: Keeping Vintage Craftsmanship Alive
- Conclusion
- Frequently Asked Questions
Last Updated: September 29, 2026
How to Spot High-Quality Vintage Clothing Before You Buy
Most shoppers judge vintage by the label or era. That is a mistake. The 5 vintage craftsmanship standards for beginners that separate a wearable heirloom from a rag come down to construction, not nostalgia. At Vinthentic, we offer premium apparel, footwear, and accessories that blend vintage aesthetics with modern comfort, and the same five checks apply whether you browse a flea market or a curated rail.
Standard 1: Vintage Classification and Provenance
Vintage classification is the process of dating a garment by era, typically dividing true vintage (20 to 99 years old) from antique (100 years or more) and from modern reproductions. Provenance is the documented history of who made it, when, and where.
What Counts as Vintage, and What Counts as Antique
A common collector rule: 20 years old is the floor for "vintage," 100 years the ceiling before "antique." Anything newer is secondhand. This matters for pricing and condition grading, since older garments have had more time to degrade.
Reading Labels, Tags, and Union Marks for Authenticity
Labels are your fastest authenticity check. Look for:
- Fiber content tags required by the FTC textile labeling rules, which have been mandatory on most garments for decades
- Union-made marks, which indicate domestic manufacturing eras
- Care instruction symbols, which changed format over time
- Country of origin stamps, which shifted with trade patterns
A missing label is not automatically disqualifying, but it removes your ability to verify material composition. Treat it as a yellow flag.
Standard 2: Identifying Authentic Vintage Fabrics and Material Composition
Identifying authentic vintage fabrics means confirming fiber content through touch, a burn test on a loose thread, and the original tag. But fiber identity is only half the job; the other half is stress testing, checking how the material has held up under decades of wear.
Natural Fibers, Blends, and What They Tell You
Natural fibers age in predictable ways, and those patterns are your diagnostic tool:
- Wool, pills at friction points (underarms, cuffs, seat), felts permanently if washed hot, and develops moth holes that enlarge over time. Good vintage wool still has loft and spring when compressed.
- Cotton, softens with age, yellows from oxidation and storage, and weakens at fold lines. Old cotton that tears like paper has lost tensile strength and cannot be restored.
- Linen, creases sharply and holds a dry, cool hand. It is one of the most durable natural fibers, but it abrades at collar and cuff edges.
- Silk, loses tensile strength with UV exposure and is prone to "shattering" (spontaneous splitting) in pieces over 60 years old. Shattered silk is not repairable.
- Leather, cracks at flex points (elbows, knees, vamp), dries out without conditioning, and delaminates if it was bonded rather than full-grain.
Material-Specific Stress Testing Checklist
What to do, by material:
Wool and wool blends
- Compress a section and release, it should spring back, not stay flattened
- Hold against light and look for thinning at underarms and elbows
- Check for moth damage along seams and folds, where larvae travel
- Tug a seam gently, wool should give slightly, not tear
Cotton and linen
- Pinch a fold line and pull, if it tears easily, the fiber is degraded
- Look for yellowing at collar and underarm, a sign of oxidation
- Check for dry rot: a musty smell plus fibers that crumble when rubbed
Silk
- Hold against light, thin, translucent patches signal weakness
- Gently tug a seam allowance; if it splits, the piece is past saving
- Avoid any silk that smells of vinegar or shows brownish staining (acid damage)
Leather
- Press a thumbnail into the surface, it should recover, not hold the mark
- Bend at a flex point and watch for surface cracking
- Check the edge for delamination (layers separating), a sign of bonded leather
Metal hardware and trim
- Test for rust, pitting, and magnetic pull (steel vs. brass)
- Check that plated finishes are not flaking to reveal base metal
How to Test Fabric Without Damaging the Garment
The safest field test uses a single loose thread from an inside seam:
- Pull one thread from an interior hem, never the outer surface
- Hold it with tweezers over a flame-safe surface
- Observe the burn: natural fibers smell like burnt hair or paper and leave soft ash; synthetics melt and smell chemical
- Note the bead: synthetics form a hard plastic bead, natural fibers do not
The Beginner's Inspection Kit
You do not need a lab. A small kit makes the process repeatable:
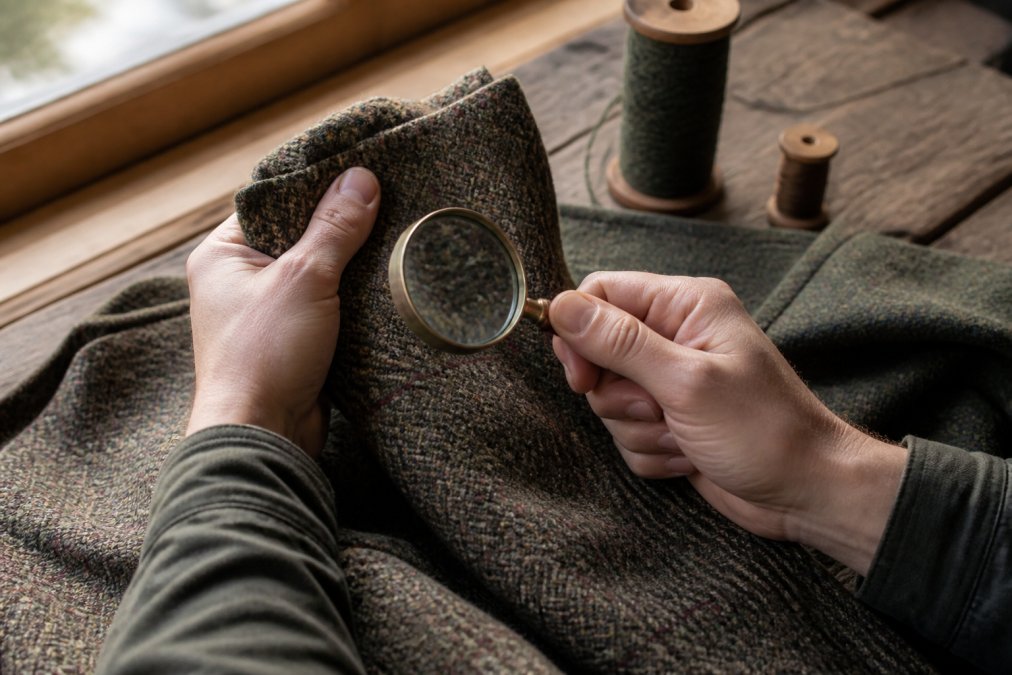
- Magnifying glass or jeweler's loupe (10x), for stitch density and fiber weave
- Seam ripper, for lifting a single thread without cutting the garment
- Small flashlight or phone light, for backlighting fabric to reveal thinning
- Tweezers, for holding a thread over a flame
- Lint roller, to clear surface debris before inspecting
- Notebook or phone notes, to record label details and measurements
Standard 3: Vintage Clothing Construction Techniques That Signal Quality
Vintage clothing construction techniques reveal more about quality than any label. Stitching density, seam integrity, and hem finishing tell you how the garment was engineered to last.
Stitching Density, Seam Integrity, and Hem Finishing
Stitching density is measured in stitches per inch. Denser stitching generally signals better construction, though extremely tight stitching on fine fabric can weaken it. Benchmark: 8 to 12 stitches per inch on a main seam indicates solid work.
Jean-Marc Tassinelli Classic Leather →
Lining Quality, Structural Stability, and Tailoring
Standard 4: Hardware Durability and Functional Assessment
Hardware durability is the most overlooked standard. Zippers, buttons, and buckles carry more stress than any seam, and a failing zipper can sideline an otherwise perfect garment. For a beginner, the value is knowing whether the hardware can be fixed and at what cost in effort.
Zipper Functionality, Buttons, and Buckles
Test every zipper by running it fully open and closed twice. Listen for grinding, feel for catches. Mid-century metal zippers often outlast modern plastic ones, but only if the teeth are intact.
What to check on a zipper:
- Teeth, missing, bent, or worn teeth mean the slider will skip
- Slider, a loose slider that does not lock is the most common failure and the easiest to fix
- Tape, the fabric strip holding the teeth; if it is frayed or torn, the zipper must be replaced
- Pull, missing pulls are cosmetic and replaceable
Repairability: What You Can Fix and What You Cannot
Most hardware failures fall into predictable categories. Knowing which is which before you buy tells you whether the piece is a bargain or a trap.
| Failure | Typical Fix | Difficulty | Worth It? |
|---|---|---|---|
| Loose or skipping slider | Pinch the slider with pliers or replace slider only | Easy | Yes |
| Missing zipper pull | Add a replacement pull or ring | Easy | Yes |
| Broken zipper teeth | Replace the full zipper | Moderate | Usually |
| Frayed zipper tape | Replace the full zipper | Moderate | Usually |
| Loose button | Re-sew with matching thread | Easy | Yes |
| Missing button | Source era-appropriate replacement | Moderate | Depends on rarity |
| Bent or broken buckle | Replace or straighten if metal | Moderate | Usually |
| Rusted hardware | Clean or replace | Easy to moderate | Yes |
A few rules of thumb:
- Sliders and pulls are cheap fixes. Do not walk away from a garment over a skipping zipper.
- Full zipper replacement is real work. It requires opening a seam, which can stress old fabric. On fragile material, this can do more harm than good.
- Era-appropriate replacements matter. A modern plastic zipper on a 1950s wool coat undercuts the piece's value. Source metal or period-correct hardware when possible.
- Rusted hardware is often cosmetic. Surface rust cleans off; pitting that has eaten into the metal does not.
A Quick Functional Test Sequence
Run this in order before you commit:
- Zip and unzip every closure twice
- Fasten every button and snap
- Buckle and unbuckle every strap
- Check that pockets are intact and not torn at the bag
- Confirm belt loops are attached and aligned
- Hang the garment and check that closures still line up under the fabric's weight
If any step fails, note whether it is a cheap fix (slider, button) or an expensive one (full zipper, buckle replacement).
Standard 5: Condition Grading, Wear and Tear, and Restoration Potential
Condition grading is a standardized way to describe wear and tear, usually on a scale from mint to poor. Restoration potential is a separate judgment: how much work the piece needs and whether it is worth it.
Repairability and Restoration Techniques
Most vintage damage falls into three categories:
| Damage Type | Typical Fix | Restoration Potential |
|---|---|---|
| Loose seam | Re-stitch by hand or machine | High |
| Small hole in wool | Reweaving or invisible mending | Moderate to high |
| Failing zipper | Replace with era-appropriate hardware | High |
| Faded dye | Overdye or leave as patina | Low to moderate |
| Torn lining | Replace lining entirely | Moderate |
| Dry rot in silk | Not repairable | None |
Rule of thumb: structural repairs are worth it, cosmetic ones depend on the piece. Restoration potential drops sharply once fibers degrade, silk shattering and dry rot in old cotton cannot be reversed.
Preservation and Care: Keeping Vintage Craftsmanship Alive
Preservation starts the day you bring the piece home. Store wool folded, not hung, to prevent shoulder stretch. Keep leather away from direct heat. Rotate garments so no single piece takes all the wear.
Conclusion
The five standards here are not gatekeeping. They are a filter. Apply them once and you will spot quality construction in seconds, whether you are holding a wool cardigan or a pair of leather boots.
Frequently Asked Questions
What are the key characteristics of vintage craftsmanship?
Vintage craftsmanship usually shows up in five places: dense, even stitching; natural fiber fabrics like wool, cotton, and linen; sturdy hardware that still functions; clean lining and hem finishing; and structural stability after years of wear. These markers separate artisanal pieces from mass-produced ones. When you evaluate vintage craftsmanship, check each of these before considering price.
How can you tell if vintage clothing is well-made?
Turn the garment inside out first. Look for tight, consistent stitching density, no loose threads, and seams that lie flat without puckering. Check the lining for quality and whether it is attached cleanly. Test any zipper, button, or buckle for smooth function. Well-made vintage clothing holds its shape when hung and shows even wear rather than stress points at seams.
What materials were commonly used in high-quality vintage apparel?
High-quality vintage apparel relied on natural fibers: wool, cotton, linen, silk, and leather. Blends existed but often signaled lower price points at the time. Material composition matters because natural fibers age differently than synthetics. Wool and leather develop character with wear, while synthetic blends pill and crack. Identifying authentic vintage fabrics starts with checking fiber content and how the material has aged.
Is a 20-year-old item considered vintage?
Most definitions place vintage at 20 to 99 years old, with antique reserved for pieces over 100 years. A 20-year-old item can qualify as vintage, though collectors often distinguish between true vintage and simply old. Provenance and construction methods matter more than age alone. A 2005 jacket with dense stitching and natural fibers may outlast a poorly made 1970s piece.
How do I know if a vintage piece is worth restoring?
Assess restoration potential by checking three things: whether the fabric has structural stability, whether hardware can be repaired or replaced, and whether the seams can be re-stitched without damaging the material. Small fixes like button replacement or hem repair are usually worthwhile. Major fabric deterioration or missing linings often cost more to fix than the piece is worth.
Read more
5 Stylish Relaxed Fit Trousers for Men: 2026 Guide
Discover 5 stylish relaxed fit trousers for men in 2026. Compare fits, fabrics, and prices to find your perfect pair. Explore the best relaxed fit.
Read more
Comfortable Everyday Outfits for Work From Home
Discover comfortable everyday outfits for work from home that keep you polished on video calls. Explore capsule wardrobe staples and business casual picks.
Read more